Your first 3D game
Build Gem Collector: drive a cube around a walled field and collect every gem before the clock runs out. Every snippet below is from the shipped, tested example.
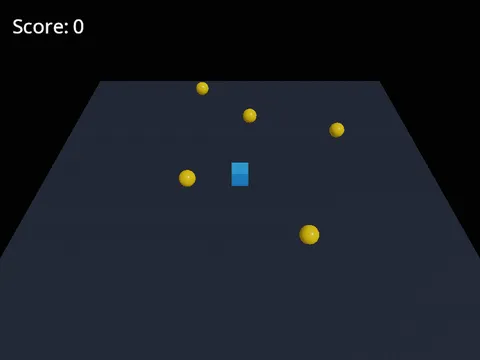
Play it in your browser first: Gem Collector. Then get your own copy and run it:
pip install --pre "simvx[examples]"
simvx examples copy tutorials_gem_collector --to gem_collector
python gem_collector/main.py
From a source checkout, prefix commands with uv run. Read the
whole file on the source host.
Nodes, input actions, Properties and signals work as they did in Your first 2D game. What is
new is space itself, and the physics nodes that live in it: CharacterBody3D, Area3D signals,
a Timer, a follow camera, and pause and restart.
1. The field
The imports, and the three numbers that tune a round:
import math

from simvx.core import (
    Anchor,
    Area3D,
    Axis2D,
    BodyMode,
    BoxShape3D,
    Button,
    CanvasLayer,
    CharacterBody3D,
    ChaseCamera,
    CollisionShape3D,
    Colour,
    Control,
    Controller,
    DirectionalLight3D,
    Input,
    Key,
    Label,
    Material,
    Mesh,
    MeshInstance3D,
    Node,
    Panel,
    PhysicsBody3D,
    Property,
    Signal,
    SphereShape3D,
    Timer,
    TouchController,
    UpdateMode,
    Vec3,
    on_input,
)
from simvx.graphics import App

FIELD = 11.0  # half-width of the square play area
GEM_COUNT = 8
ROUND_TIME = 30.0  # seconds to collect every gem
The root is a plain Node. It declares the move action once, for every device, then builds
the world in on_ready:
class GemCollector(Node):
    """Builds the field and keeps the score and the clock."""

    input_context = {"move": [Axis2D.WASD, Axis2D.ARROWS, Controller.LEFT_STICK]}
    score = Property(0)

    def on_ready(self):
        self.add_child(DirectionalLight3D(direction=(-1, -2, -1), intensity=1.3, colour=(1.0, 0.97, 0.9)))
        slate = Material(colour=(0.24, 0.27, 0.32), roughness=0.9)
        self.add_child(MeshInstance3D(mesh=Mesh.plane(2 * FIELD + 2), material=slate))
        edge = FIELD + 0.5
        for half, position in (
            ((edge, 1.0, 0.5), (0, 1.0, -edge)),
            ((edge, 1.0, 0.5), (0, 1.0, edge)),
            ((0.5, 1.0, edge), (-edge, 1.0, 0)),
            ((0.5, 1.0, edge), (edge, 1.0, 0)),
        ):
            self.add_child(wall(half, position))
In 3D, Y is up, so the ground is the X/Z plane.
A visible object is a
MeshInstance3D: aMeshfor the shape (Mesh.box,Mesh.sphere,Mesh.plane) and aMaterialfor the look.roughnessruns from 0 (glossy) to 1 (matte).A scene with no light of its own gets a fixed default key light, so something always shows. A
DirectionalLight3Dreplaces it with a sun: parallel rays, so it has adirectionand no position.
Each wall is a static physics body with a box for collision and a box mesh to see:
def wall(half_extents: tuple, position: tuple) -> PhysicsBody3D:
    """A static box the player slides along."""
    body = PhysicsBody3D(mode=BodyMode.STATIC, position=position)
    body.add_child(CollisionShape3D(shape=BoxShape3D(half_extents=half_extents)))
    size = Vec3(*half_extents) * 2
    body.add_child(MeshInstance3D(mesh=Mesh.box(size), material=Material(colour=(0.4, 0.45, 0.55), roughness=0.8)))
    return body
A body’s collision geometry is a CollisionShape3D child holding a shape resource
(BoxShape3D, SphereShape3D). What you see is a separate MeshInstance3D child, so the two can
differ.
2. The player
class Player(CharacterBody3D):
    """A cube that the `move` action slides over the ground."""

    speed = Property(8.0, range=(1, 20))

    def __init__(self, **kwargs):
        super().__init__(**kwargs)
        self.add_child(CollisionShape3D(shape=BoxShape3D(half_extents=(0.5, 0.5, 0.5))))
        self.add_child(MeshInstance3D(mesh=Mesh.box(1.0), material=Material(colour=(0.3, 0.7, 1.0), roughness=0.4)))

    def on_fixed_update(self, dt: float):
        move = Input.value("move")
        self.velocity = Vec3(move.x, 0.0, move.y) * self.speed
        self.move_and_slide(dt)
CharacterBody3D is a body that your code moves. Movement runs in on_fixed_update, on the
fixed physics step: set velocity, then call move_and_slide(dt). It moves the body and slides
it along anything solid in the way, which is why the player glides along a wall instead of
sticking to it. The player never leaves the ground, so it needs no gravity.
Input.value("move") is one Vec2 from whichever device is in use, never longer than 1, so a
diagonal is no faster than a straight line. Its y maps onto world Z: up on the stick is away
from the camera.
3. A camera that follows
self.player = self.add_child(Player(position=(0, 0.5, 0)))
self.add_child(ChaseCamera(target=self.player, offset=Vec3(0, 12, 10), rotate_with_target=False, half_life=0.3))
ChaseCamera is a Camera3D that follows its target. offset is where it sits relative to
the target; rotate_with_target=False keeps that offset fixed in the world, so the view does not
swing round. half_life is the lag: the seconds it takes to close half the gap. For a camera that
stays put, use a plain Camera3D(position=..., look_at=...).
4. Gems are areas
class Gem(Area3D):
    """A spinning gem that announces the player reaching it, then disappears."""

    collected = Signal()

    def __init__(self, **kwargs):
        super().__init__(**kwargs)
        self.add_child(CollisionShape3D(shape=SphereShape3D(radius=0.6)))
        gold = Material(colour=(1.0, 0.84, 0.2), roughness=0.25)
        self.add_child(MeshInstance3D(mesh=Mesh.sphere(0.5), material=gold))

    def on_ready(self):
        self.body_entered.connect(self.on_body_entered)

    def on_update(self, dt: float):
        self.rotate_y(2.5 * dt)

    def on_body_entered(self, body):
        if isinstance(body, Player):
            self.collected.emit()
            self.destroy()
An Area3D detects bodies without blocking them. When one enters, it emits body_entered with
that body. The gem checks it is the player, calls its own collected signal and removes itself
with destroy().
The root places the gems in two rings and connects every one to the same handler:
for i in range(GEM_COUNT):
    angle = i * math.tau / GEM_COUNT
    radius = FIELD * (0.4 if i % 2 else 0.8)
    gem = self.add_child(Gem(position=(math.cos(angle) * radius, 0.6, math.sin(angle) * radius)))
    gem.collected.connect(self.on_gem_collected)
The gem never touches the score, and the score never polls the gems.
5. The clock and the end of a round
A Timer counts duration seconds down and emits timeout:
self.timer = self.add_child(Timer(duration=ROUND_TIME, autostart=True))
self.timer.timeout.connect(lambda: self.end_round("Out of time"))
The HUD is two Labels on a CanvasLayer, and a TouchController for touch players (section 6):
self.hud = hud = self.add_child(CanvasLayer())
self.score_label = hud.add_child(Label(anchor=Anchor.TOP_LEFT, inset=16, font_size=28))
self.time_label = hud.add_child(Label(anchor=Anchor.TOP_RIGHT, inset=16, size=(160, 36), font_size=28))
self.add_child(TouchController(buttons=()))
The labels are refreshed every frame from score and the timer’s time_left. Collecting the
last gem wins and the timeout loses:
def on_update(self, dt: float):
    self.show_hud()

def show_hud(self):
    self.score_label.text = f"Gems: {self.score} / {GEM_COUNT}"
    self.time_label.text = f"Time: {math.ceil(max(0.0, self.timer.time_left))}"

def on_gem_collected(self):
    self.score += 1
    if self.score == GEM_COUNT:
        self.end_round("You win!")

def end_round(self, message: str):
    self.show_hud()  # the last frame's numbers, since a paused root stops updating
    self.timer.stop()
    self.tree.paused = True
    screen = self.hud.add_child(EndScreen(message, update_mode=UpdateMode.ALWAYS))
    screen.restart_requested.connect(self.restart)

def restart(self):
    self.tree.paused = False
    self.tree.change_scene(GemCollector())
tree.paused = True stops every node whose update_mode resolves to PAUSABLE, which is the
default, so the player and the gems freeze. The end screen is added with
update_mode=UpdateMode.ALWAYS, so it alone keeps running and hearing input:
class EndScreen(Control):
    """A dimmed overlay with the result and a way to play again."""

    input_context = {"restart": [Key.R, Key.ENTER, Controller.START]}
    restart_requested = Signal()

    def __init__(self, message: str, **kwargs):
        super().__init__(anchor=Anchor.FULL_RECT, **kwargs)
        scrim = self.add_child(Panel(anchor=Anchor.FULL_RECT))
        scrim.bg_colour = Colour.rgba(0.0, 0.0, 0.0, 0.6)
        self.add_child(
            Label(message, anchor=Anchor.CENTER, inset=(0, 0, 0, 90), size=(400, 48), font_size=40, alignment="centre")
        )
        again = self.add_child(Button("Play again", anchor=Anchor.CENTER, inset=(0, 60, 0, 0), size=(200, 44)))
        again.pressed.connect(self.restart_requested.emit)

    @on_input("restart")
    def on_restart(self, _event):
        self.restart_requested.emit()
R, Enter, a pad’s Start button and the Play again button all emit restart_requested. The root
unpauses and tree.change_scene swaps in a fresh GemCollector, which is a whole new round.
6. Touch
TouchController(buttons=()) draws an on-screen stick and a Start button and publishes them as
a controller, so move and restart read them with no other code. It leaves the screen once a
real controller is used.
Next steps
Copy the finished game:
simvx examples copy tutorials_gem_collector --to gem_collector(source).Change
GEM_COUNT,ROUND_TIMEor the player’sspeedand play again.From monolithic to composed: split a game into small nodes.
Physics: bodies, areas, shapes and queries.
Cameras (3D), Materials and WorldEnvironment: the look of a 3D scene.
Examples Gallery: every example, including the 3D feature references.